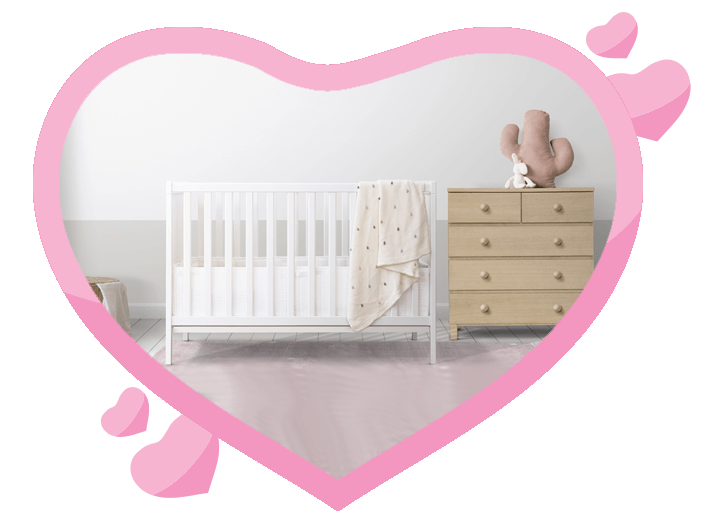
Painting The Crib Made Easy - A Step-By-Step Guide
If you are wondering how to refurbish a crib, you will find your answers in quick steps from this simple to-do guide.
How To Paint a Baby Crib Safely?
Are you thinking of decorating your baby’s crib? If the paint of the baby crib is fading away it is a good time to consider a DIY project for your baby’s crib. After all, why would you want to spend a lot of money to buy a new crib when you can DIY at home at a much lower cost!
Want to know How to paint a baby crib? It is very simple and does not require any heavy machinery, you just need to be aware of a few things beforehand. You have to choose the right paint (baby safe), be in possession of a few necessary equipment and know the actual process of painting.
Here, I have discussed the whole process of how I usually paint my baby’s crib and listed a few pro tips and tricks which will help you get a good understanding on how to paint your baby crib.
How to Evaluate The Best Baby Safe Paint For Cribs
Pick The Best Paint Safe For Baby Cribs. Not all paints are safe for babies as some of them contain toxic chemicals. These chemicals are extremely harmful when it is inhaled by the little ones. Which is why when you are out to buy paints, remember to look for the baby safe paints that excludes any kind of chemical that is toxic, VOC, fragrance or lead.
I would recommend buying a paint that is antimicrobial as well as hypoallergenic (for extra safety). If the little one has breathing problems, then paints containing these qualities mentioned above will be safe for them. The growth of bacteria will also lessen by a great amount.
I would suggest you go for baby safe paint from the following:
The Preparation Phase For Painting A Baby Crib

As you have gained knowledge about what kind of paint would be best for your baby, go ahead and select your choice of color. If there is doubt you can check on the internet as there are tons of great coloring ideas available.
Make sure to check the paint’s coverage, the amount and the kind of finish it offers. You can pick between glossy or matte or even chalky. After this, you have to prepare a few things for the actual painting process keeping in mind the safety tips that will be provided below.
Getting the right equipment beforehand and ready will be more efficient and you can do your work more confidently knowing everything you need; you already have near you.
Being Safe Than Sorry
You might think painting a crib is comparatively easier than painting an entire house (which is true!) but the same safety measures are applied even when you are painting your baby’s crib. You have to avoid getting toxic fumes into your lungs or accidental spills which can be harmful for your health. Keep in mind that:-
- You need to keep the surroundings ventilated if you decide to paint indoors. Paints produce a certain type of fume that is inflammable, so it is very important to open your doors and windows for the fumes to go out.
- Do not bring any kind of fire near your painting process because of the previously mentioned inflammable property of the paints. No smoking or lighting cigarettes and no fire altogether.
- Equip yourself with coveralls and face shields. Keep an extra pair of gloves as gloves are a must in the painting process.
Essential List Required For Painting
Now, you have to make a list of the essential things you are going to be in need of for painting your baby’s crib. Here are a few things I needed while painting the crib:-
Sandpaper

Before you start applying the paint you have to prep the surface of the crib with sandpaper. It helps eliminate the imperfections and the finish in the end will look smoother. Other than that the paint will stick well to the crib if you sand the crib first.
However, choose a sandpaper which is best in quality as it does the job quicker and more easily. One such sandpaper that is of good quality is Miady Assorted Grit Sandpaper, a premium product and you can use it for your other furniture too, even wooden ones.
Paintbrushes

Brush paints are the best choice when it comes to painting a crib and as always look for the best quality paint brushes to make your job easier. You can get two types of brushes in the market – synthetic brushes and natural brushes.
Synthetic brushes are best for painting with baby safe paints as they are water-based. Water-based paints offer greater safety and do not affect the little one’s health in any way. Synthetic brushes are a perfect match for water-based paints.
Synthetic brushes such as ProGrade paint brushes or Purdy Nylon Series paint brushes are some of the best quality products available in the market. Purdy gives you large strokes and the bristles are made of nylon. ProGrade offers you five brushes so quantity is also good. Both the brushes are easier to handle and after you finish painting it will look very professional.
Cleaning Material

Painting is a work that is bound to get messy so you have to be prepared with the cleaning tools. A clean piece of cloth is best as well as keep water handy so that you can wipe any unnecessary spilling accidents. However, do be careful not to spill as it is a hassle to clean it up.
Keep the surrounding empty because if the paint spills, it can get on the nearby furniture. Wiping off the paint might sound good but not all paints come off easily as some are very stubborn.
A Step-By-Step Guide Which will Help You With The Process of The Painting
Since you now have the necessary equipment for painting and have understood the safety measures it is time to learn the painting process step-by-step so let’s put all hands-on deck for this one!
1. Thorough Cleaning of Crib To Remove Dirt
It is not unlikely to notice dust particles and debris on your little one’s crib even if you dust the crib on a regular basis. The first step is to thoroughly clean any dirt or dust that is present on the crib. Take a clean cloth and start wiping the crib and get in every corner making sure that the cleaning is thorough.
If there are stains on the crib or any stubborn spot you need to use either a furniture cleaner (if the stain does not come off easily) or you can just wipe the stain with the clean cloth wet with cold water. If you paint over the stain, it will give a pimple like look after you finish the painting.
Other than the aesthetically displeasing appearance, the specs of dust and dirt actually slows the process of the paint drying as well as creates hindrances for the paint to bond. In some cases, the paint does not dry properly so it is a very important step and should not be skipped.
2. Sanding The Surface To Increase Adhesion
Now that the surface of the crib is clean, prepare to sand down the crib. If there is existing paint on the crib don’t worry about getting all of it out. It will work even if you execute a general sand down. Just sand down the crib enough to expose the surface so that the new paint sticks to the crib.
Sanding down is a step that allows the paint to probe the wood better that will make the finish look very smooth. If you try to wipe off all the previous paint, it will take a very long time and additionally you have to spend more money on buying a quality primer to apply.
3. Wiping Off The Sand dust
When you sand down the crib you will notice sand dust on your crib. You do not want to paint over the sand dust otherwise you will get a bad appearance after the finish. The dust particles left on the crib will get mixed with the paint causing it to look very aesthetically displeasing with a rough finish.
You can avoid this by removing the sand dust from the crib first. For that, take a microfiber cloth and wipe off the sand dust thoroughly.
4. Coating With A Primer
Now, if the crib you bought has no paint or you want to apply a different color on the crib over the already existing ones, you need to apply a layer of primer first. If the color you have chosen is quite similar to the already existing paint color, then you don’t need to follow the next step, just resume your painting process from step number 6.
However, keep in mind that not all primers dry quickly, and the timing varies for various reasons such as – the humidity level or the atmosphere, the temperature of the room and the type of manufacturer.
5. Round Two of Sanding
Go through the paint instructions once and if there is no mention of doing the sand down once, it is better to perform a second round of sanding for the paint to stick to the surface of the crib easily. After you are finished with the sanding (keep in mind that the sanding needs to be a light one) take a tack cloth to wipe off the sand dust.
6. Applying The Paint
You can now apply the first layer of paint on your little one’s crib. If the paint you chose gives you full coverage, then one layer will be all you need. However, it is hard to attain full coverage paint and most paints (even though they claim to be full coverage) can’t give you enough coverage in one coat.
Do not overload the paint brush with paint because paint running down the surface of your crib is not what you are going for. Slow, precise strokes are required and be extra careful around the edges of the crib. After you are done with the first coat leave the paint to dry (it takes about 2 to 4 hours).
Now you are ready to apply the second layer of paint on the crib. The second layer will give your crib a solid appearance. The second layer of paint needs to be left overnight to dry out completely.
A Quick Tip: Before going to the pro tips here’s a quick tip to make your job easier – No matter what paint you buy, give a thorough reading to the instructions listed for the paint. Not all paints have the same method of preparing and the process of paint might be different as per instruction. The time period for the drying process of each paint also varies as I have experienced a few difficulties in the past, so I am giving you a heads up.
7. Pro Tips To Make The Job Easy
Here I will give you 7 very crucial tips which are gathered from experience and a few paintings pros. If you want your crib to get an attractive and professional look while making the entire job easier for you follow these:-
- Avoid painting in a humid atmosphere because it will take longer for your paint to dry so choose a sunny day.
- Rather than giving random strokes, only stroke in upward motion and downward motion. This way you will get a flawless finish on your crib.
- If there are places you don’t want to paint, put a cover on them and since paint can drop on the floor, put your crib on a piece of canvas cloth. This will cut down the process of cleaning the paint later in half.
- For the railing of the crib use a sponge as it will give you a smoother finish in the end.
- If you want to protect the crib and make it last longer then use a sealant.
- Since your paint will most probably be water-based it is important for you to choose a water-based primer as well.
- You need to keep your hands clean so you can use Latex gloves as they do a good job.
Conclusion
These tips are given considering the fact that you are an absolute beginner so that you have every bit of information you need before you embark on this painting project. If you follow these steps exactly as it states, your painting process will be free from unnecessary hassle. Remember to equip yourself with protective gear, buy high quality brushes and get to painting with baby safe paints.
FAQ:- By Moms & Dads
Is Priming Necessary?
If you are making drastic changes in the color (from black to white) you need to use primer. In that case it is better to eliminate all the previous paint before you add primer. However you can buy paint that has built-in primers.
Can I Paint A Crib Without Sanding?
Applying a direct coat of paint on the existing one without sanding will cause flaking and premature peeling (especially the original finish is glossy). Sanding is an essential part of painting so do not skip it.
What Kind of Paint to Apply on a Baby’s Crib?
You need to buy baby safe paints that do not contain harmful substances such as toxins, VOC, fragrance or lead. You can use paints like Country Chic Chalk Style Paint or Retique It Chalk Furniture Paint.
Is Painting a wooden crib safe?
Wooden cribs are normally safe to paint however make sure that the wood will not start to flake or peel as then it can be harmful for the baby (as babies tend to chew or put their mouth on the everything)
Do I Need to Prime?
Yes, priming is necessary when you are changing the color of your crib in a drastic measure which means if the previous color of your crib is completely different from the current color you chose to paint the crib, then you need to prime.
What finish is the best for a baby’s crib?
While glossy and semi-glossy might look very attractive and shiny (we all know how much babies like shiny objects!) It is better to choose eggshell finish because of its high stain resistance and durability. The cleaning is also easy, and they somewhat project a shiny appearance.
As some children are prone to teeth the crib during their growth, Is Lullaby paint a safe option for them?
Lullaby paint has zero VOC and has non-toxic properties which is why it is safe for babies who are prone to teeth the crib. This paint is also EN71-3 certified and is used for children’s toys as well. They are exclusively designed so that there are no harsh chemicals in the paint.
I have already primed my crib. Is sand down necessary after prime so the paint will stick?
Primer fills out the uneven pores on the surface of the crib giving it a smoother surface and a flawless finish at the end. The solid base created by the primer will be able to take the paint well if you sand it down. So yes, sanding down the primer is necessary for your paint to stick better.
Does this method work on compressed wood?
Yes, this painting method works on compressed woods. However, if you are painting on a compressed wood you have to prepare the wood thoroughly by sanding it down properly. The bumpy surface of the compressed wood will be smooth after the sand down which will help the paint to adhere properly on the crib.
Can Cribs be Painted?
Yes, you can DIY it at home or you can ask help from a professional. Since painting a crib is easier and you definitely can do it by yourself for a much cheaper price it is recommended that you follow the steps mentioned above to paint the crib yourself.
How to Choose the Correct Paint for your baby’s Crib?
Make sure the paint is toxin free, lead free, VOC free, is water soluble and has low to none fragrance and almost no additives. Since cribs are for babies it is absolutely essential to buy a paint that is safe for them.
What are the Necessary Supplies for Painting the Baby’s Crib?
You need three things for painting – safety gear such as gloves, coveralls and face shields, equipment for painting such as paint brushes and sandpaper and the last thing is the cleaning materials like tack cloth, canvas cloth, clean cloth and water. Other useful tips are discussed in the above section of the article so give it a read if you want to know how to DIY paint your baby’s crib.
Is Oil-based Stain Blocking Primer Safe to Use While Painting the Baby's Crib?
You have to choose what is the safest for your baby and oil-based stain blocking primers contain a high number of VOC. VOCs are extremely harmful for your little ones so do not choose an oil-based stain blocking primer for the painting process of your crib.
What Finish is the best for a crib?
You should choose eggshell finish for a crib because eggshell finishes have stain resistance quality and have better durability. They are easier to clean as well while giving it a somewhat shiny finish which babies love.
Is sand down necessary after I have applied the primer on the crib?
Sanding after prime is not an absolute necessity but it will make the paint adhere better to the crib’s surface and make the painting process easier while giving it a flawless and smooth finish.
How Can I Paint the Spindles Easily?
For spindles of a crib use a sponge rather than a brush. You need to paint the spindles with the sponge in one go. However, make sure the sponge is clean before you apply the paint.

More For You!


Baby Gear
- Best Changing Table
- Best Strollers
- Best Cribs
- Best Car Seats
- Best Essentials Checklist
Game On Mommy
© Copyright 2020 by Gameonmommy.com. All rights reserved. We are a participant in the Amazon Services LLC Associates Program, an affiliate advertising program designed to provide a means for us to earn fees by linking to Amazon.com and affiliated sites.